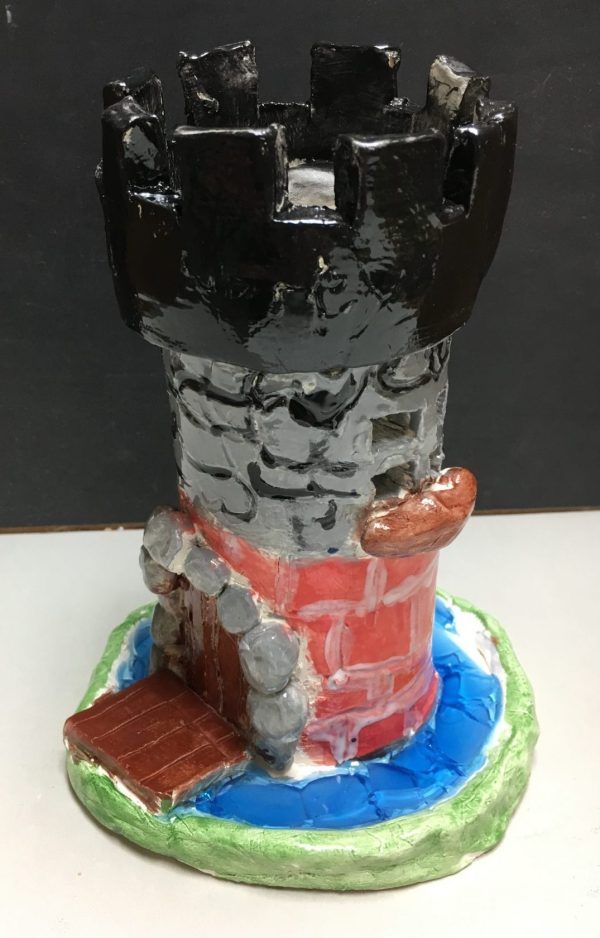
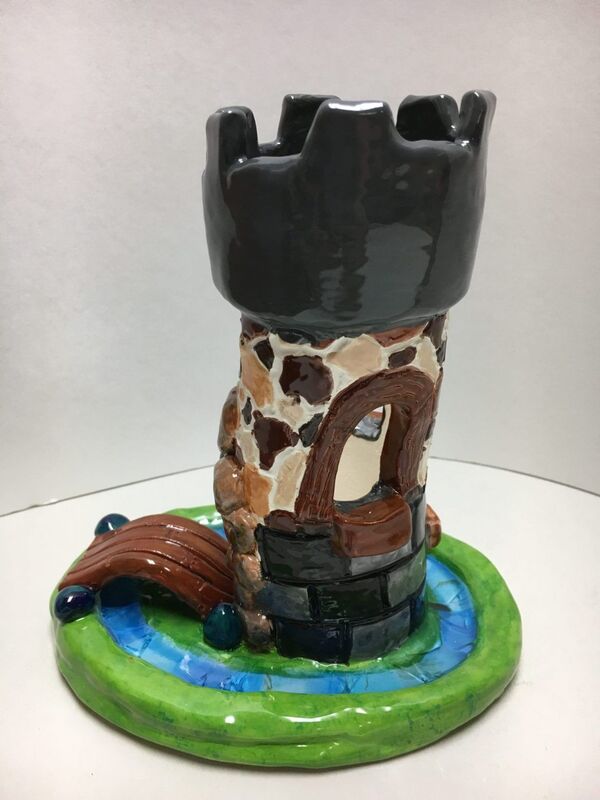
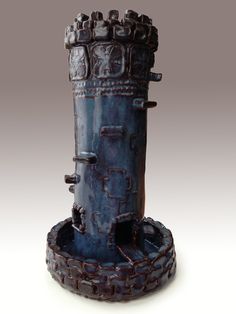
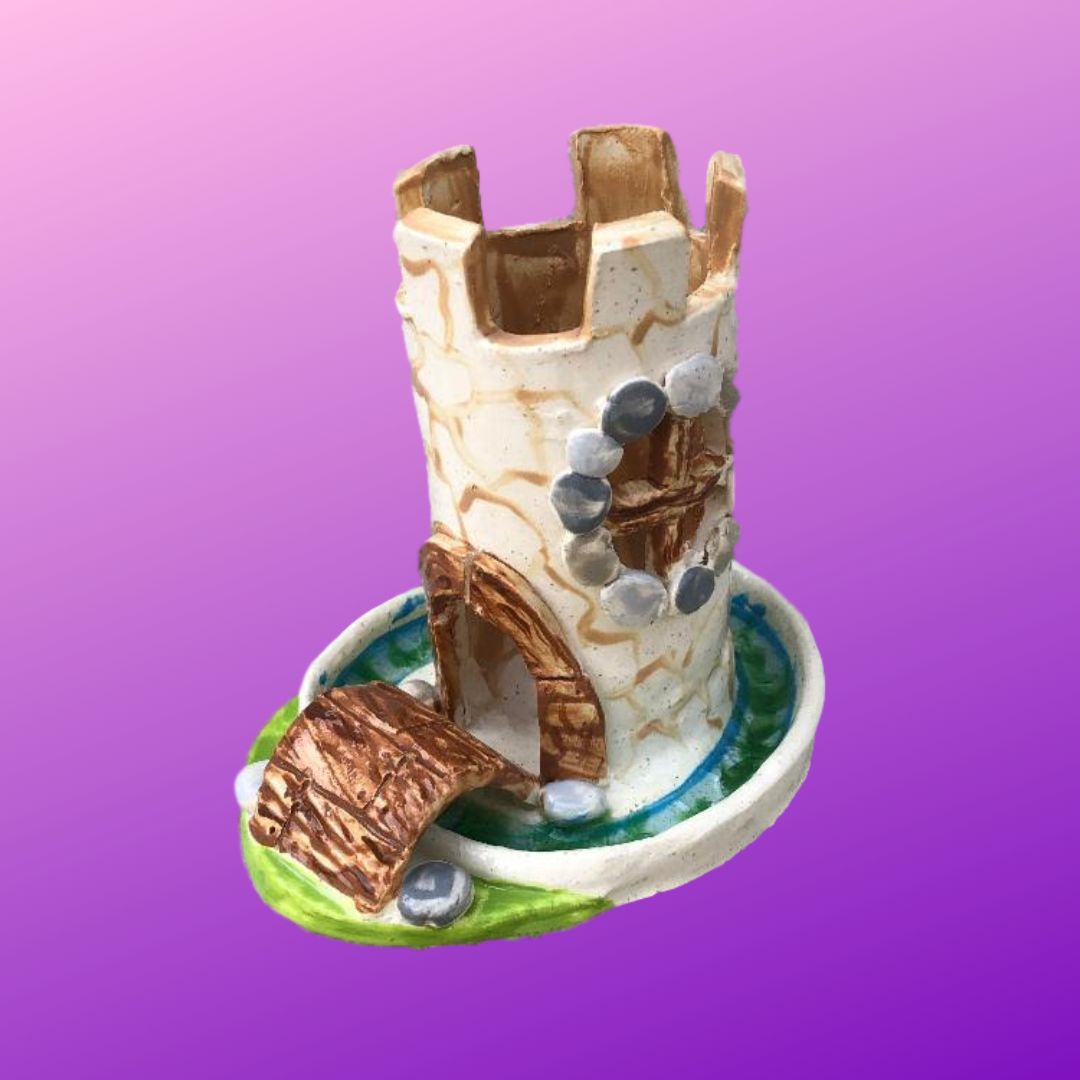
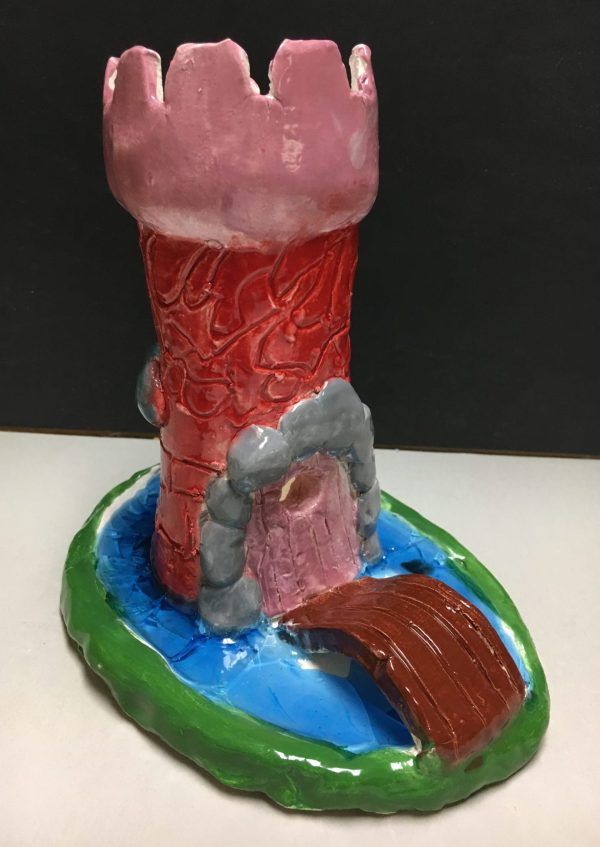
Slab Castle with Glass Moat
Project Description: Students will create a castle tower moat using slab building methods. Students will also melt glass in the moat to create a water effect.
Day 1, 2, and 3:
-Wedge clay.
-Roll out slab (1/4 inch thick).
-Create tower piece, moat base and any other slab pieces needed.
-Roll the tower slab around a tube to help start the form.
-Place all pieces on a board and bag up.
-Let dry slightly overnight until tower slab begins to stay in a roll.
Day 3, 4, and 5:
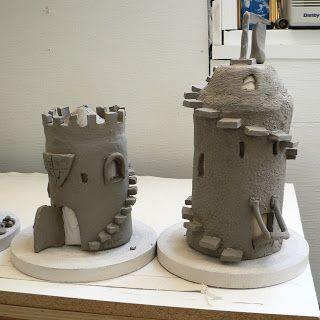
-Take clay off the roll and attach sides together to create a cylinder.
-Add a lip to your base to keep the glass from flowing out when it melts.
-Attach your tower to your base.
-Cut out the battlements (square shapes at the top) and start adding windows, doors, a bridge and other details.
Day 6, 7, and 8:
-Start adding different textures to create affects similar to a castle.
-Add other details needed.
Goals/Objectives/Learning Targets:
-Slab rolled out evenly using the sticks to measure 1/4 inch thick.
-Slab cut out for base, tower and other small pieces such as a bridge, door, top or windows.
-Tower is a cylinder shape. (Tube used to help form.)
-All Pieces attached properly using score and slip. (Tower should be attached to moat.)
-Moat should have a lip so when glass is added it doesn't run out.
-Battlements are cut out of the top.
-Details are added such as windows, doors, bricks, stones, bridge.
